
Continuous Integration Using Travis (Nodejs)
We’ll be building a basic node application and add continuous integration to it using travis-ci.


Shivam Bhasin
We’ll be building a basic node application and add continuous integration to it using travis-ci.
Now first things first! What the heck is CI.
A CI process is a process in which software is developed by multiple sources and is automatically integrated via an established procedure. The flow might go something like this:
- Push to Git
- A process is triggered
- The relevant branch is pulled, the app is built, and tests are run
- The results of this process are sent to whom it concerns
If all tests pass, it means the code can be safely (well, safely in the areas the tests cover) be merged into the main branch.
I guess that’s enough for basics. Lets’s dive into coding part now!
Let’s start coding!
For starters we want a very basic node app.
- Create a directory in your system with any project name you want, cd into it and run npm init -y . This will create a package.json file.
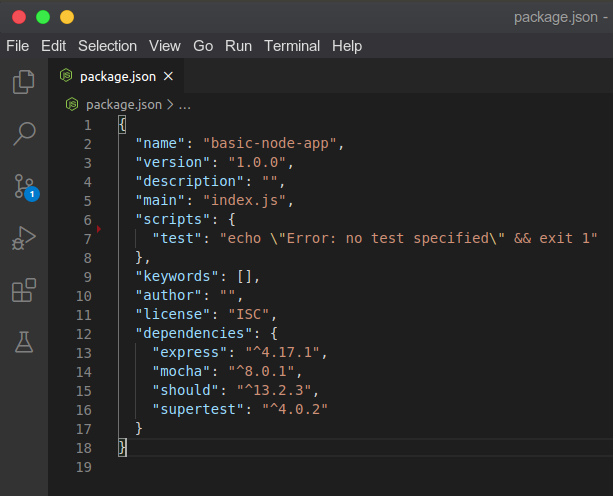
- We’ll be using express to create a server and mocha, supertest and should for testing. Install these dependencies with npm i express mocha supertest should . Afer running this command your package.json file should look like this.

3. Now create a file app.js and paste the following code in it.


4. We also have to write some test for travis to run. So create a folder test in the root directory and create a file test.js. Add the following code to it.


5. Congratulations!! You’ve now created a basic node app. Now create this a git repository and push your code to github. Please make sure to add a .gitignore file and remove the package-lock.json file if it’s created.
Now we have to do dome configurations before using travis-ci in our project.
6. Go to https://travis-ci.com and signup using your github account. After signing up go to https://travis-ci.com/account/repositories. You’ll see the something like this.


7. Click on the green Activate button(it might ask your github password once again). Then on the opened page scroll down and find the following section.


8. Select any of your prefernce and click approve and install. (If you chode only select repositories please make sure to select our basic node app which we recently pushed to github)
Go back to your node app now
9. There’s just one more thing we need to do to complete this. We already have a working nodejs app with tests on github repository which is connected to travis-ci. But travis ci needs a configuration file where we define the language which we’re using and some scripts. So open your node project and create a file .travis.yml in the root directory of your project and paste the following code in it.


10. Now as soon as you push your changes on github go to https://travis-ci.com/dashboard, select your project and you’ll see the following page.


That’s it! Congratualtions on making your first CI integration.
I’ve started writing recently so please leave a comment with your feedback ^_^. Any suggestions are welcomed!
Upvote
Shivam Bhasin
Simplifying things since childhood. Writes about JavaScript, application development, and self-help.

Related Articles